
Before you plant a single tree or pour a new patio, it pays to know exactly what lies beneath and around your yard. Buried pipes, cables, and equipment pads don’t just affect where you can dig safely, they also shape how you design walkways, gardens, and outdoor living spaces for years to come. Mapping out these lifelines early saves you from costly repairs, failed inspections, and awkward redesigns down the road. This guide walks through the major utility systems and structures homeowners need to account for when planning a functional, safe, and attractive yard.
Locate Underground Electrical and Gas Lines First
Before any digging begins, call 811, the national call-before-you-dig number that connects you to your local utility locator service. This service is typically free and required by law in most areas, with some states requiring notice as little as two business days before you plan to dig. Waiting until after you’ve finalized your layout can cost you time and money if a planned flower bed or fence post lands right on top of a gas line.
Technicians will mark the approximate path of buried electrical conduit and gas lines with color-coded flags or paint, giving you a baseline map to design around. Red typically indicates electric lines, yellow marks gas or oil lines, and other colors cover water, sewer, and communication lines, so take a photo of the markings before they fade or wash away. Use this map to rough out which zones are off-limits for trees, raised beds, or deep post holes.
Keep in mind that marked lines show general location, not exact depth, so you still need to dig carefully and maintain safe clearance. Lines can shift over time due to soil settling, erosion, or previous repairs, meaning the depth marked on paper doesn’t always match reality. As a rule of thumb, hand-dig within 24 inches of any marked line rather than using mechanical equipment, and call the utility company again if your plans change significantly or if months pass before you actually break ground.
Before you call 811 or a private locator, walk your property and note the approximate entry points where electrical and gas service connects to your house, since lines typically run in a fairly direct path from the street or meter to that connection. Once the locator marks the lines with flags or spray paint, take a photo and sketch the routes onto a simple site map you can reference throughout your planning process.
Keep in mind that locates are typically only guaranteed accurate for a couple of weeks, so time your yard projects accordingly. With the lines marked, you can plan planting beds, fences, and hardscaping features well away from them, generally keeping at least 18 to 24 inches of clearance from gas lines and avoiding deep-rooted trees or shrubs directly above either utility.
This is also the time to think about where future equipment, like an outdoor condenser unit or a generator, might need to sit, since HVAC contractors often need clear access panels and a minimum safe clearance from gas lines when installing or servicing equipment. Many local codes also require a set distance between HVAC units and property lines, windows, or combustible materials, so it’s worth checking those requirements before you finalize your layout. A little upfront planning, including leaving room for a technician to maneuver equipment and tools around the unit, prevents expensive relocations later.
Map Out Your Septic System and Drain Field
If your home relies on a septic system, the tank and drain field need to stay free of heavy structures, deep-rooted trees, and compacted soil from vehicle traffic. Draw out the boundaries of your drain field on your yard plan and treat that zone as off-limits for anything beyond light landscaping like grass or shallow groundcover. Planting trees too close can cause roots to infiltrate pipes over time, leading to backups and costly repairs.
Routine maintenance also plays into your layout decisions, since septic pumping trucks need a clear path to reach the tank’s access lid without driving over the drain field itself. It helps to mark the access point with a permanent paver or small marker so you don’t lose track of its location once landscaping fills in. Keeping this area accessible now saves a lot of frustration when service day arrives.
Account for Outdoor HVAC Equipment Placement
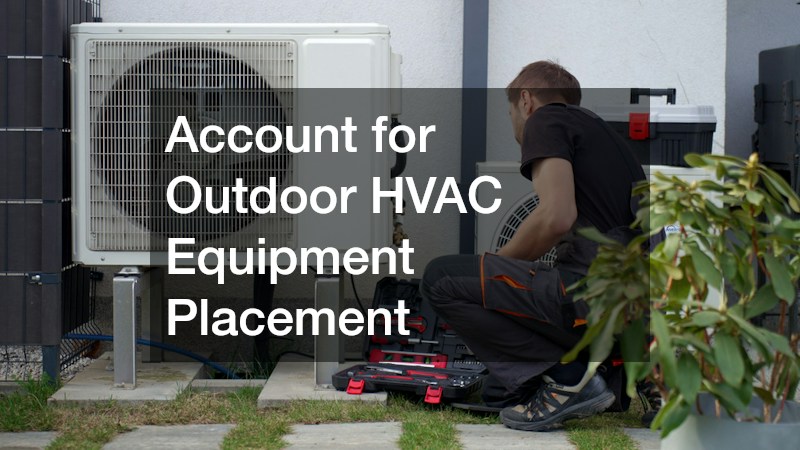
Your outdoor condenser or heat pump unit needs breathing room on all sides for proper airflow and maintenance access, typically at least two to three feet of clearance from fences, shrubs, or structures. When planning your layout, consider how a ductless mini split system might fit into your design if you’re adding a sunroom, garage conversion, or detached workspace that needs independent climate control. These units require an outdoor compressor as well, so factor in a dedicated pad location with similar clearance requirements.
Think about noise and airflow direction when positioning this equipment near patios, decks, or outdoor seating areas. A unit placed too close to a fence or dense hedge can struggle to dissipate heat efficiently, which shortens its lifespan and increases energy costs.
Plan for Seasonal HVAC Repairs and Access
Even with the best layout, HVAC systems eventually need service, so don’t box in your outdoor unit with permanent landscaping or decorative screening that blocks a technician’s path. Leave a clear walkway from the gate or driveway straight to the equipment pad, since air conditioning repair often involves carrying tools, refrigerant tanks, or replacement parts across the yard. A cluttered or overgrown approach can turn a simple service call into a time-consuming hassle for everyone involved.
- Keep at least a three-foot-wide path clear to the unit at all times
- Avoid planting fast-growing shrubs directly beside the condenser
- Install a gate wide enough for equipment carts if your side yard is the main access point
- Mark the unit’s location on any landscaping plan you share with contractors
Choose Materials for Patios and Structural Additions
When planning patios, pergolas, or raised decks near utility lines, the materials you choose can affect both installation depth and long-term durability. Standard poured concrete patios typically require footings 12 to 18 inches deep, which can put them in direct conflict with shallow gas, water, or electrical lines that often run just 18 to 24 inches below grade. Choosing a lighter structural system can help you avoid digging into that zone altogether.
Composite metal decking has become popular for elevated outdoor structures because it combines strength with resistance to rot and pests, making it a solid choice when building over or near shallow utility runs. Its lighter weight compared to solid concrete can also reduce the need for deep footings that might interfere with buried lines, since many elevated deck systems can be supported on helical piers or surface-mounted footings instead of deep poured piers.
When comparing material options, consider how each performs over utility corridors specifically. Paver patios, for instance, can be lifted and reset relatively easily if a utility repair is ever needed, whereas poured concrete usually must be broken out and replaced. Pergolas with post anchors bolted to surface footings, rather than buried concrete piers, offer similar flexibility while still providing a sturdy structure. Before finalizing your material choice, confirm the manufacturer’s footing depth requirements and cross-check them against your utility locate marks. A few inches of clearance on paper can disappear quickly once post hole augers or footing forms are actually in the ground.

Once you know where your utility lines run, the next decision is how to build around them without compromising access or safety. Material choice matters here, especially for permanent structures like patios and shed foundations. If you’re pouring a slab, consider working with a supplier who offers metered concrete, which allows you to order the precise volume needed for smaller, oddly shaped spaces common in yards with utility easements. Rather than committing to a full truckload (often 9 to 11 cubic yards), metered concrete trucks measure and dispense exactly what your project requires, down to a fraction of a yard.
This approach reduces waste and gives you more flexibility when your pour area has to curve around a marked gas line or septic access point. Precise measurement also helps avoid over-digging into zones you’ve identified as off-limits. A standard gas line, for example, may require 18 to 24 inches of clearance depending on local code, and excavating even a few inches too far can mean an unplanned call to your utility company.
For structures near easements, also weigh materials by how easily they can be removed or relocated later. Pavers and gravel beds are simpler to pull up if a utility company ever needs to access a line, while poured concrete is far more permanent. If your shed or patio sits close to a documented easement, ask your local permitting office whether removable materials are required or simply advisable.
Factor In Roofline Drainage and Gutter Placement
Your yard layout isn’t just about what’s underground, it also needs to account for water coming off your roof. Poor drainage planning can send runoff straight into equipment pads, garden beds, or even your septic drain field, causing erosion or saturation issues over time. If you’re due for a roof replacement, this is an ideal moment to reconsider downspout placement and grading so water flows away from sensitive utility zones.
Extending downspouts with underground drainage pipes can redirect water to a rain garden or dry well located well away from your utility lines. Walk your property during a heavy rain to see where water naturally pools or flows, then adjust your layout plans accordingly before finalizing hardscape positions.
Install Storm Protection Without Blocking Utility Access
Many homeowners in storm-prone regions are adding storm shelters to their yard plans, and an above ground tornado shelter is a practical option that doesn’t require extensive excavation like an underground version. Because these units sit on or near the surface, placement still needs to respect clearance from gas lines, electrical conduit, and septic components. Choose a spot close enough to the home for quick access during severe weather but far enough from utility equipment to avoid any interference during installation.
- Confirm anchor bolt locations won’t intersect marked utility lines
- Keep a clear path from the house to the shelter entrance
- Avoid placing the shelter directly above septic or drainage pipes
- Check manufacturer specs for required ground clearance and anchoring depth
Keep Exterior Drain and Sewer Lines Clear of Landscaping
Tree roots are one of the most common causes of clogged or damaged exterior sewer lines, so it’s worth mapping these pipes before choosing where to plant anything with an aggressive root system. If your yard has a history of slow drains or backups, scheduling professional drain cleaning before you finalize your landscaping plan can reveal exactly where problem areas exist. This gives you a chance to redesign planting beds around vulnerable pipe sections rather than discovering an issue after the trees have matured.
Ground-level clues like unusually lush grass patches or soggy soil can indicate a leaking line beneath the surface. Keep these areas marked on your yard plan and consult a professional if you notice recurring wet spots that don’t correspond to irrigation or rainfall patterns.
Position Water Heater and Plumbing Equipment Thoughtfully
If your water heater sits in a garage, basement, or dedicated outdoor enclosure, its venting and drainage needs should factor into your overall yard design, especially if you’re planning an addition nearby. Professionals offering water heater services often recommend maintaining clear access for inspection and replacement, which means avoiding permanent landscaping or storage directly in front of service panels. This is especially important if your unit is tankless and mounted on an exterior wall, since it will have dedicated venting that needs unobstructed airflow.
When laying out gardens or fencing near any exterior plumbing equipment, leave enough room for a technician to maneuver a replacement unit in and out without removing landscaping first. Planning this clearance now prevents the need to tear out mature plants during a future emergency repair.
A well-planned yard balances beauty and function by respecting the utility lifelines that keep your home running safely. Take time to document every buried line, access point, and piece of equipment before you break ground on new landscaping or structures. When in doubt, consult local professionals who can confirm clearances and help you avoid costly mistakes. With a clear map in hand, you can design an outdoor space that looks great today and stays easy to maintain for years to come.